Magloc®
Innovative
Shooting Accessories
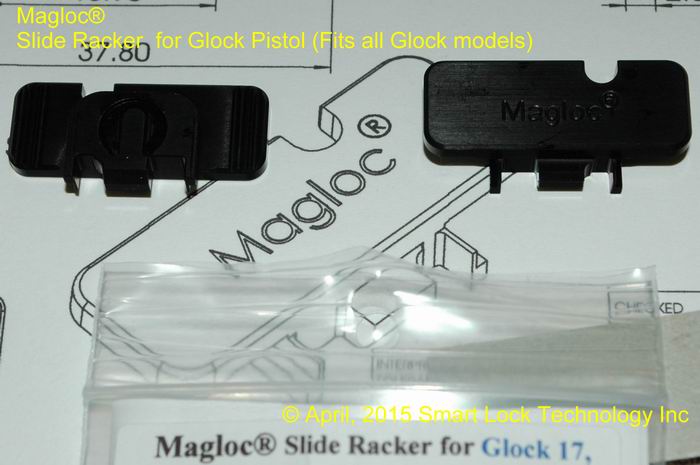
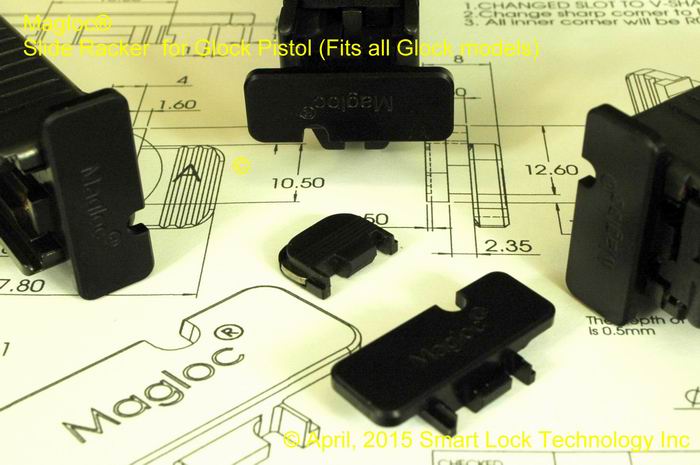
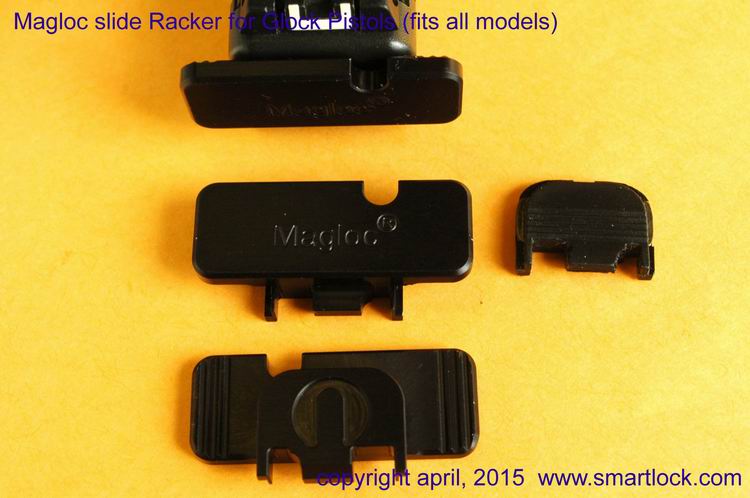
Slide
Racker
for Glock
gen 1, 2, 3 and 4 Pistols
(Fits all Glock models
except G42, 43)
Features:
1. Extended 0.25"
(6.4mm) (small and standard frame Glock) out from the Glock slide for easy
gripping
or single hand chambering.
2. Made from
Specification:
1. Fits all Glock Gen 1,2, 3, 4 all models 17 19 20 …. 41 in 9mm 10mm .357 .40 .45 cal.
(does not fit subcompact slimline G42)
2. Weight: 0.25 oz (7.0 gram) original slide cover: 0.08 oz (2.2
gram)
3. Additional length over the Glock slide:
Small and standard frame Glock (G17, 22….): 0.24" (6.4 mm).
Large frame Glock (G20, 21…..): 0.18" (4.5 mm).
4. Dimension width 1.488” (37.8 mm), height 0.571” (14.5 mm),
racker plate thickness 0.134” (3.4 mm)
(Note: different shooting sports have different
limitation on firearms modification; please consult with
the proper authority.)
Warning - before installation begins.
1. Always wear eye protection if assembly or disassembly of firearms is
required.
2. If you are not comfortable with the installation procedures
described below, please
have the work done by a qualified gunsmith.
3. Make sure the gun is unloaded before installation begins
**You
can also search the web for the installation of:
Magloc Slide Racker for Glock Pistols installation
instruction https://www.youtube.com/watch?v=J1LxuOKjLmg
Installation:
1. Separate the
slide form the frame as per Glock manual.
2. Press down the “spacer sleeve” with a small screw driver.
3. Push the slide cover plate away from the slide while keeping
part of your finger covering
the exposed extractor plunger to prevent it from
jumping out of the slide.
4. Slide the “slide racker” halfway into the slide until it is
stopped by the “spacer sleeve”
Warning:
After installation, test fire your pistol in various shooting position
and making sure that
your hands would not be in the way of the slide racker.
Also test fit with the holster you will be using
making sure everything
function..


Back to Front Page of
Smart Lock Technology Inc.